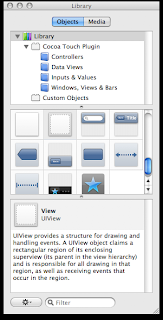
The first thing we will do is create a new Window based application in Xcode, lets call it "IBPractice." In the project window double click MainWindow.xib to open it with Interface Builder. From the Library drag a UIButton and a UILabel into your Window.
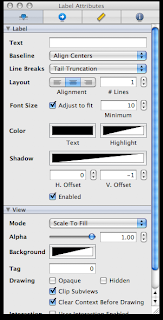
We should probably resize the label to make sure our text shows without being truncated. To do this click on the label to show its borders, which are represented with a series of points, and drag them to make the label larger. Move to the Inspector to set the alignment of the label to center and to have no text. This is what we want our Inspector to look like:
Now double-click on the button and set its title to “Show Text” by simply typing it in and pressing enter.
Now click somewhere in the view that is not the label or button. Now in the Inspector click the “i” button.

Now we must move to the Connections tab in the Inspector window.

This tells Xcode that MainView is a subclass of UIView.
Now move to the MainView.m file. Within the brackets of – (IBAction)showText is where we will create our code to make things work. We will tell our program to display “Hello World” within our label. To do this add the following line of code:
Now click somewhere in the view that is not the label or button. Now in the Inspector click the “i” button.
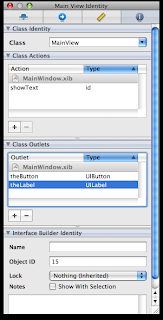
Under “Class Identity” in the text box enter MainView. This will later become a class file. Under “Class Actions” click the “+” and make a new action, call it “showText.” Then under “Class Outlets” click the “+” to add two outlets. Outlets are what lets xcode and interface builder know what objects we are talking about. Name the first outlet “theButton” with a type of “UIButton” and the second type “theLabel” with a type of “UILabel.” We should have the following now:
Now we must move to the Connections tab in the Inspector window.
Here is where we will tell Interface Builder what outlet is connected to what object. Click and drag the circle to the right of “theLabel” into our UILabel in the view window. This tells Interface Builder that anytime we call “theLabel” in our code that we want to do things to that UILabel. Now click and drag the circle to the right of “showText” into our button. This will bring up a menu of options, we want to select “Touch Down.” Each of these options require a different touch to initiate the action. Touch Down says that as soon as the object is touched to fire the action associated with it, in this case, that action is “showText.” Now we have one last thing to do in Interface Builder before heading back to Xcode.
Select File -> Write Class Files. Be sure to have “Create '.h' file” checked, then save. Then click the check box next to IBPractice and select Add.
It is now time to return to Xcode. In Xcode open MainView.h and replace your @interface line with
Select File -> Write Class Files. Be sure to have “Create '.h' file” checked, then save. Then click the check box next to IBPractice and select Add.
It is now time to return to Xcode. In Xcode open MainView.h and replace your @interface line with
@interface MainView : UIView {
Now move to the MainView.m file. Within the brackets of – (IBAction)showText is where we will create our code to make things work. We will tell our program to display “Hello World” within our label. To do this add the following line of code:
And that is all! We have created a very basic interface using Interface Builder. Using what you learned here you should be able to make much more complex interfaces.theLabel.text = @"Hello World";
The source code for this tutorial can be downloaded here.
thanks for sharing!
ReplyDelete